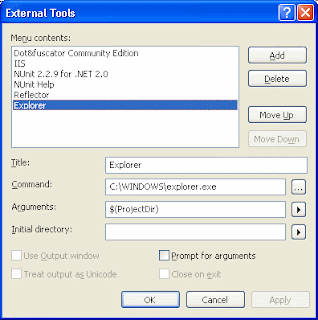
Select Tools, External Tools to bring up the External Tools dialogue box. Enter a title in the title field. In the command field, enter the path to the Windows Explorer executable. In the arguments field, enter $(ProjectDir) or select Project Directory from the side menu. Your dialogue should look as follows. Click OK.

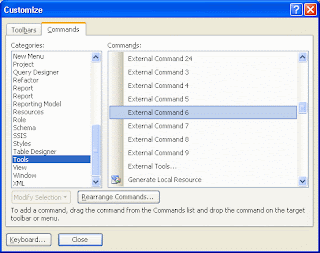
You could leave it there. You can now click on a project in Solution Explorer and select Tools, External Tools, and pick the item that you added. Windows Explorer will open at the project’s location. To make things even slicker, add the external tool as an item on the tool bar. To do this, right-click on the tool bar and select Customize. In the left-hand pane of the dialogue box, select Tools. In the right-hand pane, select the item you added and drag to the tool bar. This is tricky as the tools are just shown as External Command 1, External Command 2 and so on. You will need to work out the number assigned to yours.

Once you’ve dragged the right one to the tool bar, you can give it a name and icon as you like by right-clicking on it again (still in Customization mode) and tweaking the settings.
No comments:
Post a Comment